
Introduction
Logitech G Hub lets you import or write custom Lua scripts (macros) for your mouse or keyboard, automating everything from key combos to weapon recoil control. This Logitech G Hub tutorial walks you through the full setup – from installing the software to importing your macro file and assigning it to a button. We’ll keep it casual and clear, so even if you’re new to scripting, you’ll have your gaming macros ready in no time. Ready to level up? Let’s go! Disclaimer: This guide is for educational purposes only. Ensure any script usage complies with game policies to avoid penalties.
Download and Install Logitech G HUB
- Get G Hub from the official site. Go to the Logitech G website and download the latest version of G Hub. It’s free and quick to install.
- Run the installer as Administrator. Right-click the installer and choose “Run as administrator.” This step is crucial – running G Hub with elevated privileges ensures your scripts will work correctly in games (some titles block macros unless G Hub is an admin process).
- Complete setup. Follow the on-screen prompts and let G Hub install. Once done, launch G Hub. You’re now ready to configure it for scripting.

Initial G Hub Setup
First, tweak G Hub’s basic settings so your scripts can run smoothly:
- Disable On-Board Memory Mode. In the G Hub main window, find the lightning-bolt icon (the On-Board Memory toggle). Make sure it’s OFF (shown below). Disabling on-board memory forces your mouse to use the software settings for macros, which is essential for scripts to work.
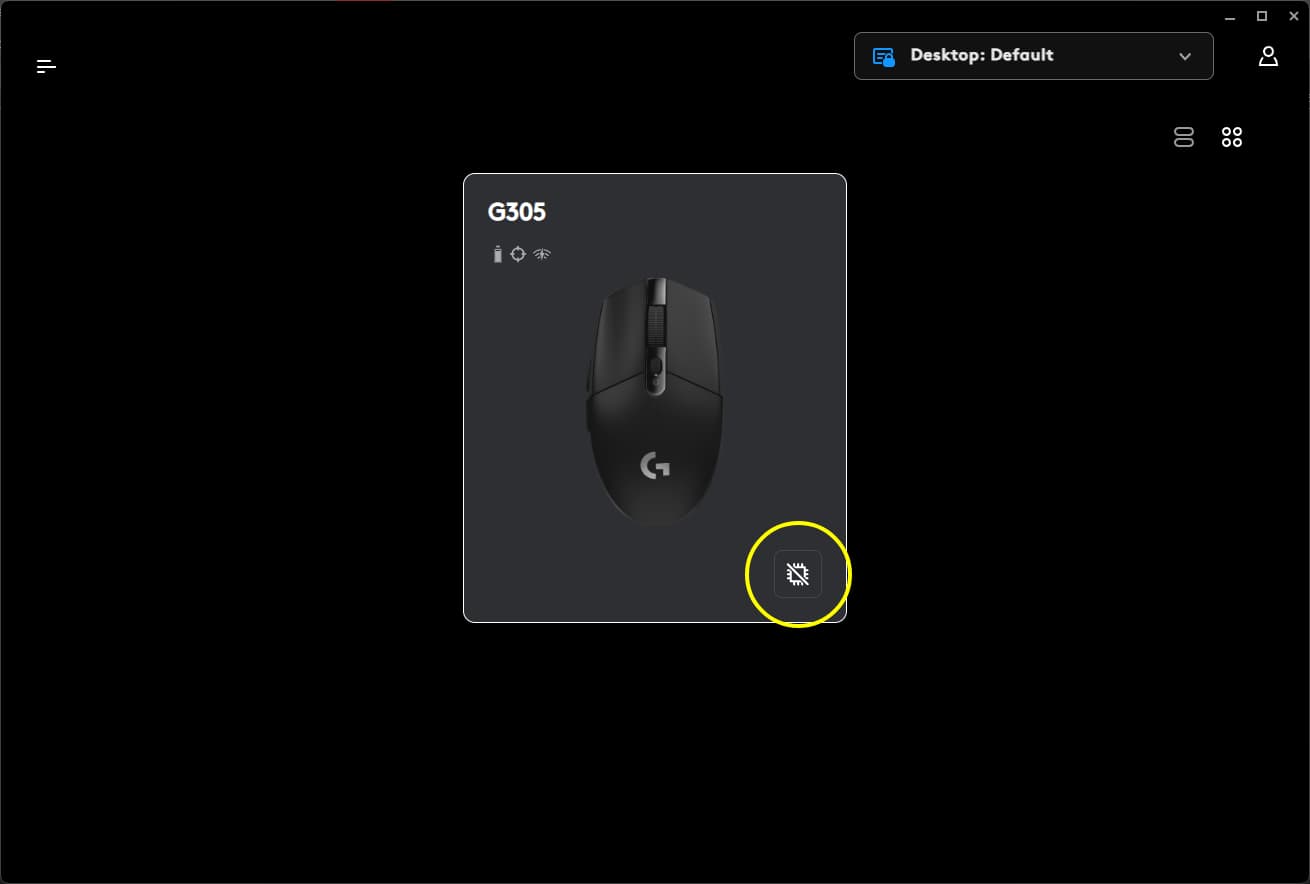
With G Hub open, click the lightning icon so “On-board Memory Mode” reads Off. This ensures your mouse uses G Hub (software) macros instead of its internal memory.
-
Streamline your DPI profiles (optional). If you have multiple DPI settings, consider keeping only one and locking it. This prevents any unexpected sensitivity changes while a macro is running.
-
Clear unused button assignments. Go to the Assignments tab for your device. For any keys/buttons you plan to use for macros, remove or disable existing assignments. This makes sure your script can take control of those buttons.
-
Focus on the Desktop profile. By default, G Hub creates game-specific profiles. For scripting, it’s best to use the “Desktop” profile only. Later we’ll make Desktop permanent, but for now just ensure you’re viewing the Desktop (default) profile in G Hub.
Configure Profiles and Settings
Logitech recommends using the Desktop profile for all scripts to avoid conflicts. This means G Hub will apply your macros across all games/apps, instead of tying them to one title.
-
Select the Desktop profile. In G Hub’s upper corner, click the profile dropdown and choose “Desktop: Default” (that’s your PC’s generic profile). Once selected, you’ll see it on your screen (see image below). Always use this profile when working with scripts.
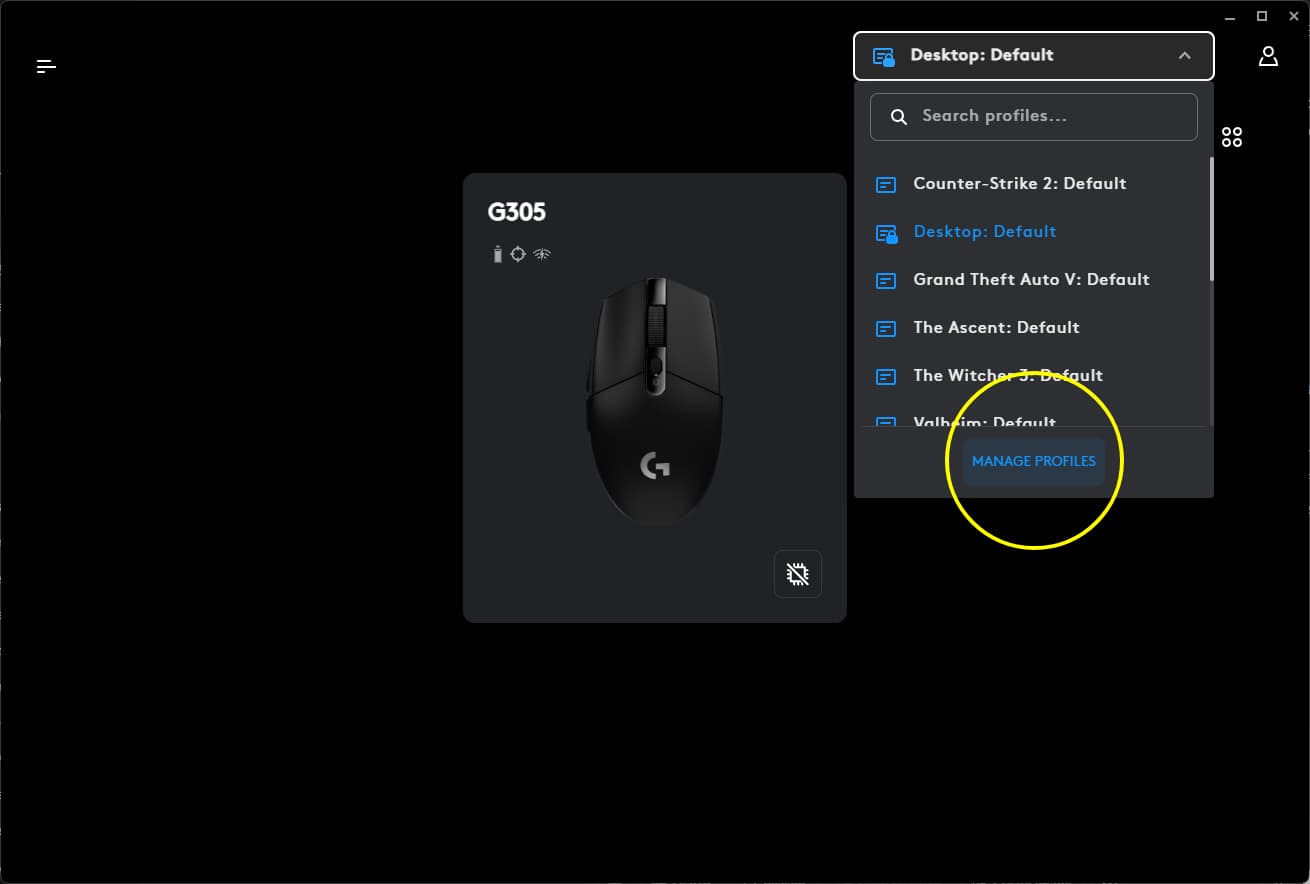
In G Hub’s top-right, pick the “Desktop” profile (default). Using the Desktop profile for scripts avoids any game-specific conflicts.
-
Make Desktop profile permanent. To lock in the Desktop profile, click Details under the Desktop profile and then click “Make Permanent” (or “Set as persistent”). The menu will indicate the profile is now fixed (see image below). This ensures G Hub won’t switch profiles on its own, and your macros stay active whenever G Hub is running.
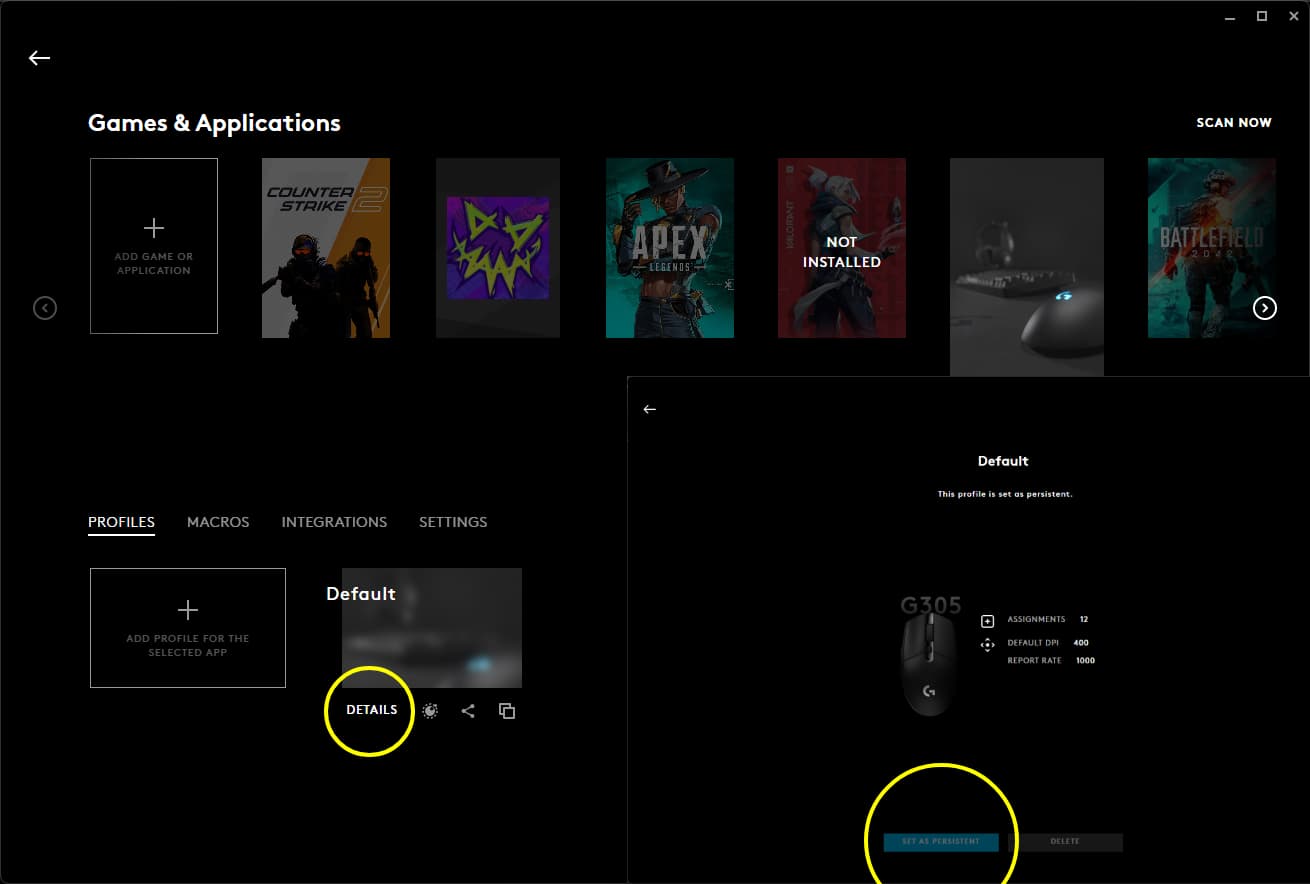
In the Desktop profile’s settings, click Make Permanent (highlighted above). The profile will say “Permanent” or show a lock icon. This locks G Hub to use Desktop by default.
-
Save your settings. After this, close any extra profile menus. Your G Hub is now primed: only one DPI stage, unwanted keys freed up, and Desktop set as the default permanent profile.
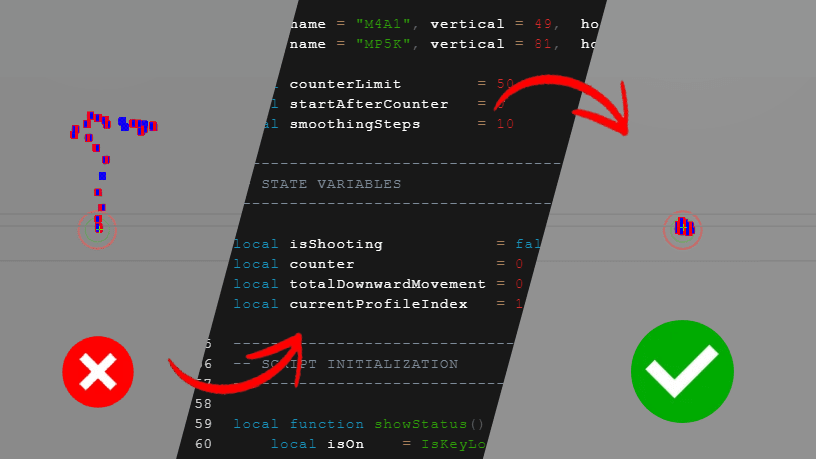
Create and Import a Lua Script
Now for the fun part – adding your macro script into G Hub:
-
Open the Scripting menu. In G Hub, click on your device (mouse) icon, then look for a Scripting or Macros section. Click “Create a new Lua script”. (G Hub’s interface might say something like “Create New LUA Script”.)
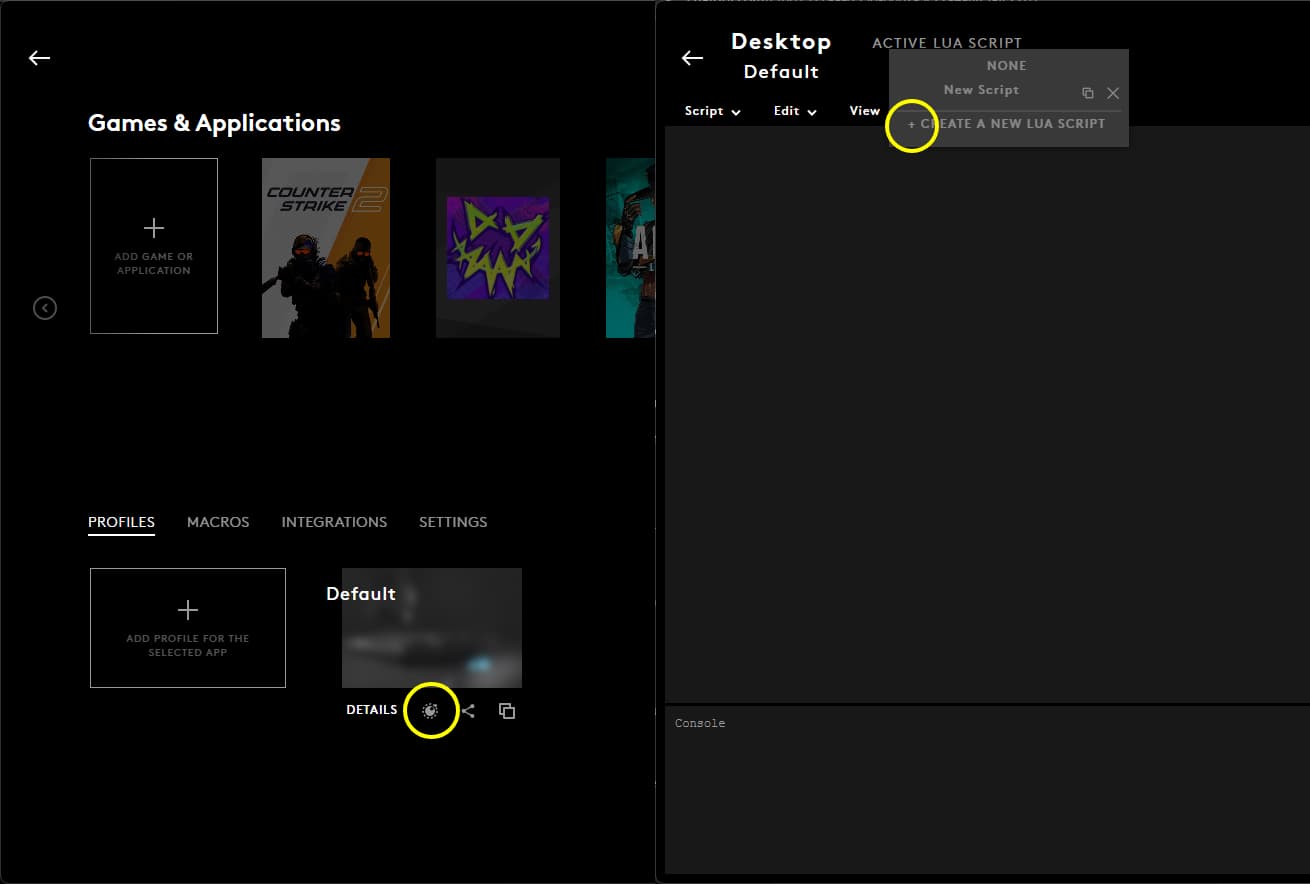
_Click Create Script (or “+”) on the Desktop profile. This opens the Lua scripting interface.
-
Import or paste your .lua script. Once the scripting window appears, go to the Script menu at the top and choose “Import” or “Edit > Paste.” Browse to where you saved your .lua macro file and open it. Your code will load into G Hub.
- _If you haven’t written your own, you can download pre-made Logitech macros online.
-
Save and run the script. After that, go back to the Script menu and select “Save and Run.” This activates the macro immediately. G Hub will compile the code and start the script engine. You should see the script listed as enabled now.
-
Name and organize. Give the script a clear name (like “AK-47 Recoil Compensation”) so you remember what it does. You can also create multiple scripts by repeating this process if you want several macros available.
Testing Your Macro
- Try it out on the Desktop. Stay in the Desktop profile and press (or hold) the button you assigned. The macro should activate immediately. For example, a recoil script would move your aim pattern when you shoot; a writing macro would paste text. You can test it in a simple program or game.
- Hold-down scripts. Some macros (like a burst-fire script) might require holding another key (e.g. right-click to aim) while you press the macro button. This depends on how the Lua code is written. If your macro isn’t doing anything, try different combinations like holding right-click with one hand and tapping the macro button with the other.
- Observe its effect. As a quick check, you should see your script’s action. If it’s a complex action (like drawing a shape), try it in a safe context first. You know it works when the cursor or game reaction matches what the script is designed to do.

Troubleshooting: Macros Not Working
If something isn’t working, don’t worry – common fixes can help:
- Run G Hub as Admin again. Even after install, make sure the running G Hub process is elevated. Some games will block macros unless G Hub is an admin app.
- Check Desktop profile is permanent. In G Hub’s profile details, confirm the Desktop profile shows as Persistent (permanent). If it isn’t, re-set it as permanent and restart G Hub.
- Disable On-Board Memory (again). Make sure that lightning-bolt toggle is still off. If it accidentally got turned back on, macros will bypass G Hub and use the mouse’s onboard memory, which might not have your script.
- Restart G Hub. Sometimes you need to close G Hub completely and reopen it (as admin) to refresh the scripts. This often fixes minor glitches.
- Re-import or recreate the script. If your .lua file has an error or conflict, try reloading it or writing a simple test script (e.g. a single keystroke) to verify G Hub’s scripting is functioning.
- Update or reinstall G Hub. If G Hub is buggy or stuck, try updating to the latest version. In rare cases, uninstalling and installing an older stable version, then updating, can solve weird issues.
If you see error messages in the Scripting window, double-check the Lua code. And remember, always test safely.

Conclusion
There you have it – a complete Logitech G Hub scripting guide for gamers. By now you’ve installed G Hub, turned off onboard memory, locked in your Desktop profile, and imported your first Lua macro. You’ve assigned it to a mouse button and seen it in action. Now you’re ready to create or download more gaming macros, automate complex moves, and elevate your play. Just be sure to use scripts responsibly and stay within any game’s rules. Enjoy your new Logitech macro setup, and happy gaming!